| SUSE LINUX – Administration Guide Part I. Installation / Chapter 1. Installation | ||||
|---|---|---|---|---|
 | Part I. Installation | 1.2. Starting SUSE LINUX |  | |
| SUSE LINUX – Administration Guide Part I. Installation / Chapter 1. Installation | ||||
|---|---|---|---|---|
| Part I. Installation | 1.2. Starting SUSE LINUX | | |
Table of Contents
Abstract
SUSE LINUX can be installed in a number of ways. The possibilities range from a graphical quick installation to a text-based installation allowing numerous manual adaptions. The following sections cover various installation procedures and the use of diverse installation sources (CD-ROM, NFS). This chapter also features information about resolving problems encountered during the installation and a detailed section about partitioning.
![[Important]](admon/important.png) | Important |
|---|---|
This chapter focuses exclusively on special installation procedures. Refer to the User Guide for a comprehensive description of the standard graphical installation procedure. | |
In addition to installing with the assistance of a graphical interface, SUSE LINUX can also be installed with the help of the text version of YaST (console mode). All YaST modules are also available in this text mode. The text mode is especially useful if you do not need a graphical interface (e.g., for server systems) or if the graphics card is not supported by the X Window System. The visually impaired can also benefit from this text mode.
First, set the boot sequence in the BIOS to enable booting from the CD-ROM drive. Insert the DVD or CD 1 in the drive and reboot the machine. The start screen is displayed after a few seconds.
Use ↑ and ↓ to select within ten seconds to prevent YaST from starting automatically. If your hardware requires special parameters, which is not usually the case, enter these in Boot Options. The parameter textmode=1 can be used to force YaST to run in text mode.
Use F2 () to set the screen resolution for the installation. If you expect your graphics card to cause problems during the installation, select . Then press Enter. A box appears with the progress display Loading Linux kernel. The kernel boots and linuxrc starts. Proceed with the installation using the menus of linuxrc.
Other boot problems can usually be circumvented with kernel parameters. If DMA causes difficulties, use the start option .
If your CD-ROM drive (ATAPI) crashes when booting the system, refer to Section 1.5. “ATAPI CD-ROM Hangs While Reading”.
The following kernel parameters may be used if you experience problems with ACPI (Advanced Configuration and Power Interface).
This parameter disables the complete ACPI subsystem on your computer. This may be useful if your computer cannot handle ACPI at all or if you think ACPI in your computer causes trouble.
Switch off ACPI for everything but those parts that are necessary to boot.
Always enables ACPI, even if your computer has an old BIOS dated before the year 2000. This parameter also enables ACPI if it is set in addition to acpi=off.
Prevents ACPI from doing the PCI IRQ routing.
Also refer to the SDB article http://portal.suse.com/sdb/en/2002/10/81_acpi.html.
If unexplainable errors occur when the kernel is loaded or during the installation, select in the boot menu to check the memory. Linux requires the hardware to meet high standards, which means the memory and its timing must be set correctly. More information is available at http://portal.suse.com/sdb/en/2001/05/thallma_memtest86.html. If possible, run the memory test overnight.
The linuxrc program can be used to specify settings for the installation and load needed drivers as kernel modules. Finally, linuxrc launches YaST, starting the actual installation of the system software and other applications.
Use ↑ or ↓ to choose menu items. Use ← or → to select a command, such as or . Execute the command by pressing Enter. A detailed description of linuxrc is provided in Section 12.4. “linuxrc”.
The linuxrc application automatically begins with the language and keyboard selection. Select the language for the installation (for example, ) and confirm with Enter. Next, select the keyboard layout.
If linuxrc does not offer the desired keyboard layout, select an alternative layout. Once the installation is completed, the layout can be changed with YaST.
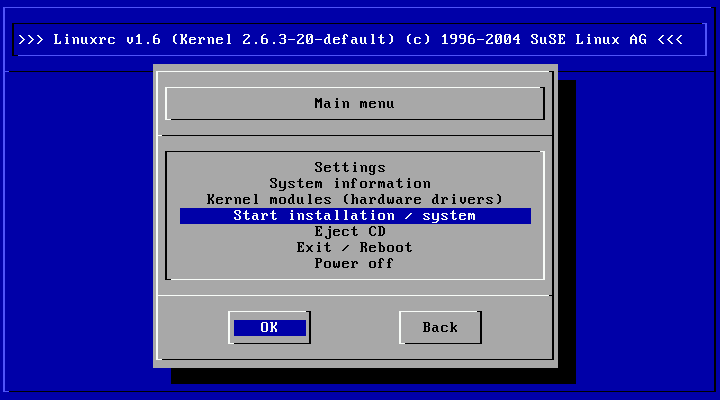
The main menu of linuxrc opens, as shown in Figure 1.2. “The Main Menu of linuxrc”. The following options are offered here:
Select the language, screen, and keyboard.
Shows information about the hardware as detected by the kernel or activated by loaded modules.
Here, load any modules needed for your hardware. Also use this to load modules for additional file systems, such as ReiserFS. Normally, you do not need to use this if both your hard disks and the CD drive (ATAPI) are connected to an (E)IDE controller, as (E)IDE support is integrated in the kernel. Details for module selection is presented later.
Proceeds to the actual installation.
Cancels the installation.
Halts the system and switches the power off.
Only load kernel modules by means of if you need support for special system properties, such as SCSI, network cards, or PCMCIA, or if the CD-ROM drive used for the installation is not an ATAPI drive. Meanwhile, other components have been separated (e.g., IDE) or added (e.g., USB, FireWire, and file systems). Information about how modules are loaded is provided in Section 12.4. “linuxrc”. Select the modules to load in the following submenu:
For SCSI hard disks or SCSI CD-ROM drives.
This is required if your CD-ROM drive is not connected to the (E)IDE-Controller or the SCSI controller. This especially applies to older CD-ROM drives that are connected to the machine by way of a proprietary controller.
For installing via NFS or FTP; see Section 1.3.2. “Installation from a Network Source”.
For file systems such as ReiserFS or ext3.
![[Tip]](admon/tip.png) | Tip |
|---|---|
If your installation medium (proprietary CD-ROM drive, parallel port CD-ROM drive, network card, PCMCIA) is not listed among the standard modules, check the additional drivers on a module disk. See Section 1.4. “Tips and Tricks” for information about how to create such a floppy disk. When ready, select . linuxrc prompts you to insert the module disk. | |
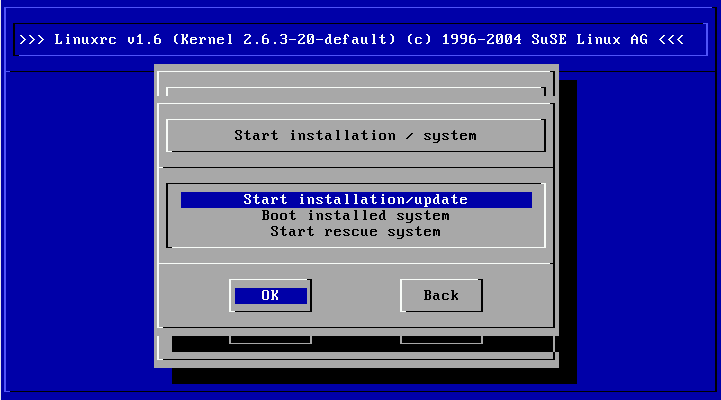
Select then press Enter to proceed with the installation.
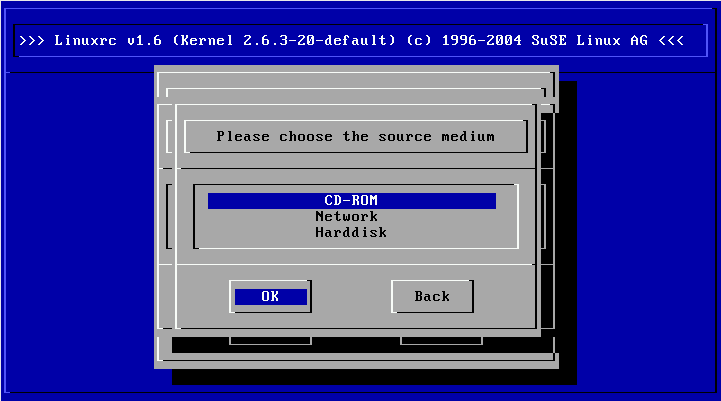
To begin the installation, select then press Enter. Then select the source medium. Usually, the cursor can be left at the default selection: .
Now press Enter. The installation environment will be loaded directly from CD 1. As soon as this procedure is completed, YaST starts in the text-based (ncurses) version. The installation then continues as described in User Guide, Chapter Installation.
If the SCSI adapter is not detected, try loading a module for a compatible driver. Alternatively, use a kernel with the appropriate integrated SCSI driver. This kernel would need to be custom-built.
The ATAPI CD-ROM drive hangs when reading the data. See Section 1.5. “ATAPI CD-ROM Hangs While Reading”.
Problems sometimes occur when loading data to the RAM disk, preventing YaST from starting. If this situation arises, the following procedure can often lead to efficient results:
Select -> in the linuxrc main menu. There, select in . Then return to the main menu and restart the installation.