| SUSE LINUX – User Guide Part III. Office Applications / Chapter 11. Address Management with KAddressBook | ||||
|---|---|---|---|---|
 | 10.6. Help | 11.2. Creating Address Lists |  | |
| SUSE LINUX – User Guide Part III. Office Applications / Chapter 11. Address Management with KAddressBook | ||||
|---|---|---|---|---|
| 10.6. Help | 11.2. Creating Address Lists | | |
Table of Contents
Abstract
KAddressBook provides quick and comfortable access to all address data of your contacts. As well as managing your local address data, KAddressBook can access, if available, a central LDAP server that hosts contact data for your entire department or your entire company. KAddressBook supports the import and export of vCard data, ensuring the smooth interaction with other programs.
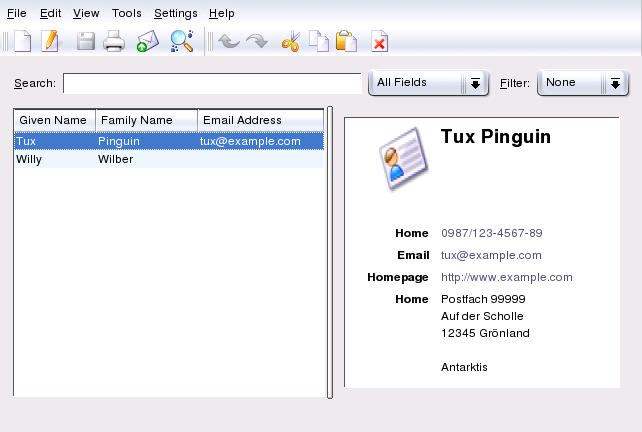
KAddressBook can be started independently from the main menu, from the appointment scheduler KOrganizer, or the mail program KMail. On start-up, the KDE Address Book window consists of three frames, shown in Figure 11.1. “KAddressBook Main Window”. The top frame contains the menu and toolbars. The two lower frames contain the current list of contacts and the address data of the currently selected contact.
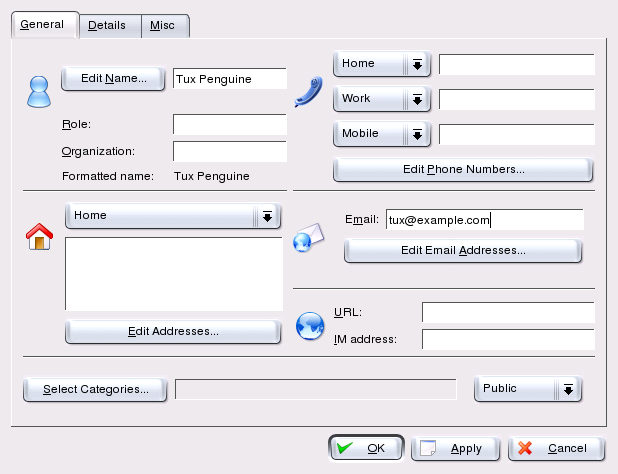
Open the contact editor with +, the respective icon, or the entry in the toolbar. A dialog opens with two tabs in which to make your entries. Refer to Figure 11.2. “Recording New Contact Information”.
Enter all important information, including name, title, private and business addresses, all phone numbers, e-mail addresses, and URLs, under the tab. If desired, assign the contact to a category that can later be used for filtering the address view. Select a standard category (Family, Friend, Business, Customer, or School) or create a new category.
The tab contains some useful additional information, such as birthdays and anniversaries, and offers the possibility to add comments for this contact. As soon as all required fields under these tabs are completed, save the data with . The new contact then appears in a list of current contacts in the left part of the window.
allows adding a picture or logo to the selected contact. Other features, like the entering the longitude and latitude of a location, are possible.