| SUSE LINUX – Administration Guide Part I. Installation / Chapter 3. Special Installation Procedures | ||||
|---|---|---|---|---|
 | 2.11. Online Update from the Command Line | 3.2. Installation with VNC |  | |
| SUSE LINUX – Administration Guide Part I. Installation / Chapter 3. Special Installation Procedures | ||||
|---|---|---|---|---|
| 2.11. Online Update from the Command Line | 3.2. Installation with VNC | | |
Table of Contents
Abstract
SUSE LINUX can be installed in a number of ways. The possibilities range from a graphical quick installation to a text-based installation allowing numerous manual adaptions. The following sections cover various installation procedures and the use of diverse installation sources, including CD-ROM and NFS. This chapter also features information about resolving problems encountered during the installation and a detailed section about partitioning.
Every machine has special routines that are executed on start-up to initialize the hardware to enable booting. During the actual boot process, these routines, referred to as the BIOS, load an image that is executed by the machine. This image can be a boot manager, but is is possible to load the kernel directly. During the installation of SUSE LINUX, a boot image containing a kernel and a program called linuxrc is loaded.
linuxrc is a program that runs in the start-up stage of the kernel prior to the actual boot process. This allows you to boot a small modularized kernel and to load the few drivers that are really needed as modules. In SUSE LINUX, linuxrc starts after the system analysis by YaST. The automatic hardware detection performed by YaST is usually quite reliable. However, if you want to load kernel modules manually or enter special parameters, you can use linuxrc interactively. In this case, start a manual installation.
The use of linuxrc is not limited to the installation. You can also use it as a boot tool for an installed system and even for an independent RAM disk–based rescue system. Refer to 5.5. “The SUSE Rescue System” for details.
The linuxrc program is a tool to define installation settings and to load hardware drivers (in the form of kernel modules). After doing so, linuxrc hands over control to YaST, which starts the actual installation of system software and applications.
Use ↑ and ↓ to select a menu item and ← and → to select an action, such as or . Confirm the selection by pressing Enter.
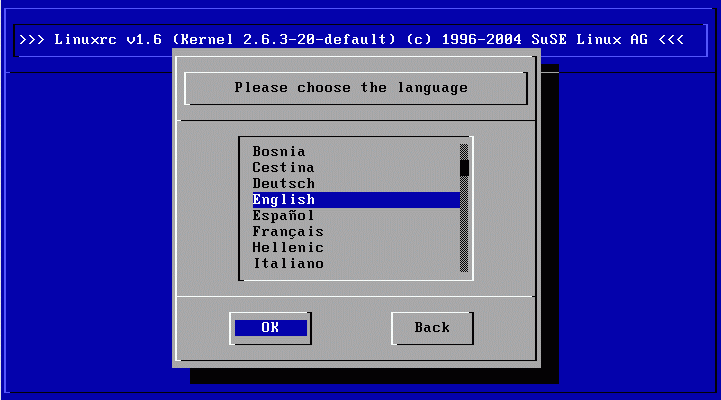
After starting, linuxrc automatically prompts you to select your language and keyboard layout. Select your desired installation language (such as ) and confirm with Enter. Next, select the layout of your keyboard (for example, ).
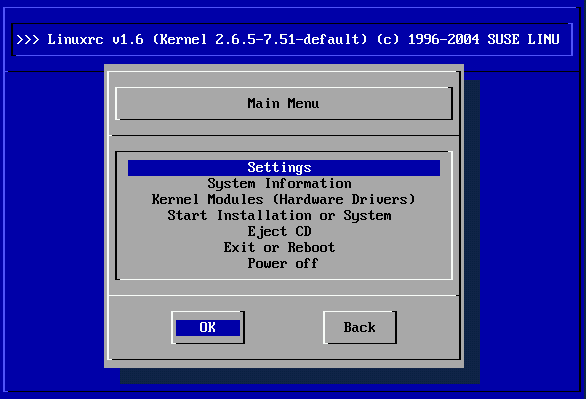
After selecting the language and keyboard, continue to the main menu of linuxrc, shown in Figure 3.2. “The linuxrc Main Menu”. Normally, linuxrc is used to start Linux, in which case you should select . Whether you can directly proceed with this option depends on the kind of hardware you use and on the scope of the installation project. Refer to 3.3. “Text-Based Installation with YaST” for more information.
With the menu, shown in Figure 3.3. “System Information”, view kernel messages and other technical details. For example, check the I/O ports used by PCI cards and the memory size as detected by the Linux kernel.
The next lines show how a hard disk and a CD-ROM connected to an (E)IDE controller announce their start. In this case, you do not need to load additional modules:
hda: IC35L060AVER07-0, ATA DISK drive
ide0 at 0x1f0-0x1f7,0x3f6 on irq 14
hdc: DV-516E, ATAPI CD/DVD-ROM drive
ide1 at 0x170-0x177,0x376 on irq 15
hda: max request size: 128KiB
hda: 120103200 sectors (61492 MB) w/1916KiB Cache, CHS=65535/16/63, UDMA(100)
hda: hda1 hda2 hda3
If you want to integrate a SCSI adapter in your system, load the respective SCSI module (see 3.1.3. “Loading Modules”). As much as possible, these modules are precompiled in the kernels shipped by SUSE. When a SCSI adapter and connected devices are detected, messages such as the following are displayed:
SCSI subsystem initialized
scsi0 : Adaptec AIC7XXX EISA/VLB/PCI SCSI HBA DRIVER, Rev 6.2.36
        <Adaptec aic7890/91 Ultra2 SCSI adapter>
        aic7890/91: Ultra2 Wide Channel A, SCSI Id=7, 32/253 SCBs

(scsi0:A:0): 40.000MB/s transfers (20.000MHz, offset 15, 16bit)
  Vendor: IBM       Model: DCAS-34330W       Rev: S65A
  Type:   Direct-Access                      ANSI SCSI revision: 02
scsi0:A:0:0: Tagged Queuing enabled.  Depth 32
SCSI device sda: 8467200 512-byte hdwr sectors (4335 MB)
SCSI device sda: drive cache: write back
 sda: sda1 sda2
Attached scsi disk sda at scsi0, channel 0, id 0, lun 0
(scsi0:A:6): 20.000MB/s transfers (20.000MHz, offset 16)
  Vendor: TEAC      Model: CD-ROM CD-532S    Rev: 1.0A
  Type:   CD-ROM                             ANSI SCSI revision: 02
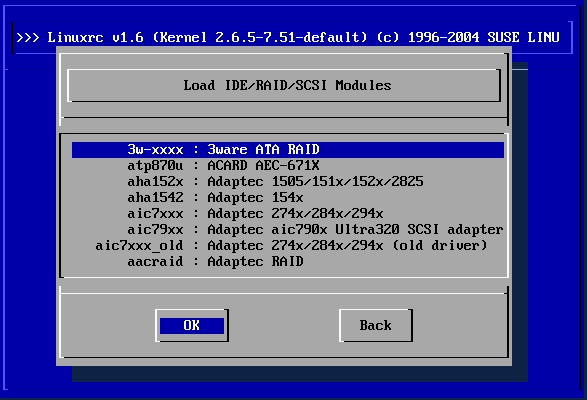
Select the modules (drivers) needed. linuxrc offers the available drivers in a list. The name of the module is displayed to the left and a brief description of the hardware supported by the driver is displayed to the right. For some components, linuxrc offers several drivers or newer alpha versions of them.
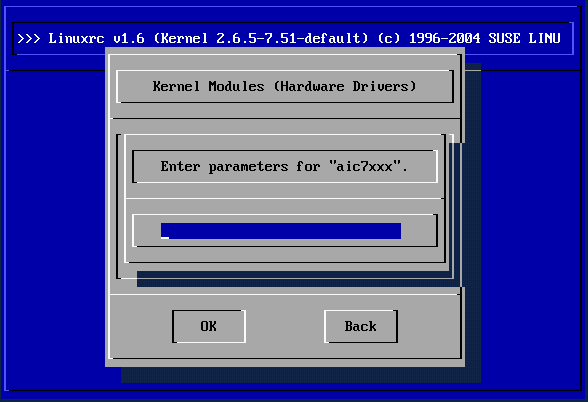
Locate a suitable driver for your hardware and press Enter. This opens a dialog in which to enter additional parameters for the module. Separate multiple parameters for one module with spaces.
In many cases, it is not necessary to specify the hardware in detail, because most drivers find their components automatically. Only network cards and older CD-ROM drives with proprietary controller cards may require parameters. If unsure, try pressing Enter.
For some modules, the detection and initialization of the hardware can take some time. Switch to virtual console 4 (Alt-F4) to watch the kernel messages while loading. SCSI drivers especially take some time, because they wait until all attached devices respond.
If the module is loaded successfully, linuxrc displays the kernel messages, allowing you to verify that everything worked smoothly. In the event of a problem, the messages may indicate the reason.
![[Tip]](admon/tip.png) | Tip |
|---|---|
If no driver is included for your installation device (proprietary or parallel port CD-ROM drive, network card, or PCMCIA) among the standard modules, you may be able to use one of the drivers of an extra module disk (to learn how to make such a floppy, refer to 3.6. “Tips and Tricks”). To do so, scroll down to the end of the menu then select . linuxrc then prompts you to insert the corresponding disk. | |
After setting up the kernel support for your hardware to the extent that is needed for the installation, proceed to . From this menu, a number of procedures can be started: , (the root partition must be known), (see 5.5. “The SUSE Rescue System”), and .
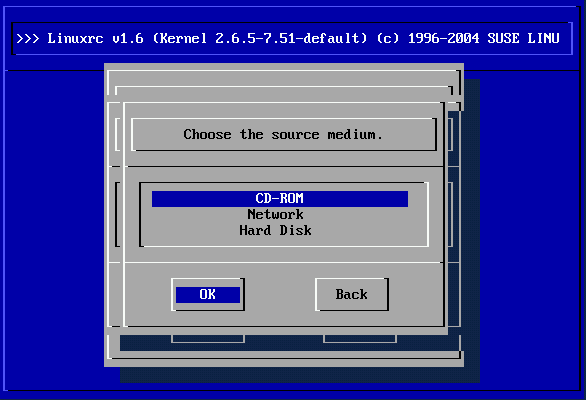
To begin the installation, select from the menu and press Enter. You are then prompted to select the installation source as shown in Figure 3.8. “Selecting the Source Medium in linuxrc”. In most cases, you can leave this at the preselected item. However, other sources can be selected for installation and similarly for the rescue system. See 5.5. “The SUSE Rescue System”) for information on the SUSE LINUX rescue system.
After pressing Enter, the installation environment loads from the selected medium. As soon as this process is completed, YaST starts and the installation begins.
To solve this, select an alternative, such as . After the installation is completed, adjust this setting with YaST.
Try loading the module of a compatible adapter. Also check whether a disk with a driver update for your adapter has been made available.
In some cases, there may be a problem loading the data into the RAM disk, making it impossible for YaST to start. If this happens, try the following steps, which should fix the error. From the linuxrc main menu, select +. In the dialog that opens, set to . Then return to the main menu and try starting the installation again.
If linuxrc does not run in manual mode, it looks for an info file on a floppy disk or in the initrd in /info. Subsequently, linuxrc loads the parameters at the kernel prompt. You can edit the default values in the file /linuxrc.config. However, the recommended method is to implement changes in the info file.
An info file consists of keywords and values in the format key: value. These pairs of keys and values can also be entered at the boot prompt provided by the installation medium using the format key=value. A list of all keys is available in the file /usr/share/doc/packages/linuxrc/linuxrc.html. The following list shows some of the most important keys with example values:
Specifies the installation source as a URL. Possible protocols include cd, hd, nfs, smb, ftp, http, and tftp. The URL syntax corresponds to the common form as used in web browsers, for example:
nfs://<server>/<directory>
ftp://[user[:password]@]<server>/<directory>
The Netdevice: keyword specifies the interface linuxrc should use, if there are several ethernet interfaces available on the installation host.
Specifies the IP address of the host.
This specifies the gateway through which the installation server can be reached, if it is not located in the subnetwork of the host.
The Proxy: keyword defines a proxy for the FTP and HTTP protocols.
This specifies the port used by the proxy, if it does not use the default port.
This keyword enables starting YaST in text mode.
The VNC parameter controls the installation process via VNC, which makes the installation more convenient for hosts that do not have a graphical console. If enabled, the corresponding service is activated on the installation host. Also see the VNCPassword keyword.
This sets a password for a VNC installation to control access to the session.
This keyword enables access to linuxrc via SSH when performing the installation with YaST in text mode.
This sets the password for the user root to access linuxrc.
This specifies a module the kernel should load and any parameters needed for it. Module parameters must be separated by blank spaces.
If set to 0, the system does not try to activate a swap partition. If set to a positive number, the partition corresponding to the number is activated as a swap partition. Alternatively, specify the full device name of a partition.