Part III. Services / Chapter 24. The Domain Name System | ||||
|---|---|---|---|---|
 | 23.4. For More Information | 24.2. Starting the Name Server BIND |  | |
Part III. Services / Chapter 24. The Domain Name System | ||||
|---|---|---|---|---|
| 23.4. For More Information | 24.2. Starting the Name Server BIND | | |
Table of Contents
Abstract
DNS (domain name system) is needed to resolve the domain names and
hostnames into
IP addresses. In this way, the IP address 192.168.0.1 is assigned to
the hostname earth, for
example. Before setting
up your own name server, read the general information about DNS in
Section 22.3, “Name Resolution”. The following
configuration examples refer to BIND.
You can use the DNS module of YaST to configure a DNS server for your local network. When starting the module for the first time, a wizard starts, prompting you to make just a few basic decisions concerning the server administration. Completing this initial setup produces a very basic server configuration that should be functioning in its essential aspects. The expert mode can be used to deal with the more advanced configuration tasks.
The wizard consists of three steps or dialogs. At the appropriate places in the dialogs, you are given the opportunity to enter the expert configuration mode.
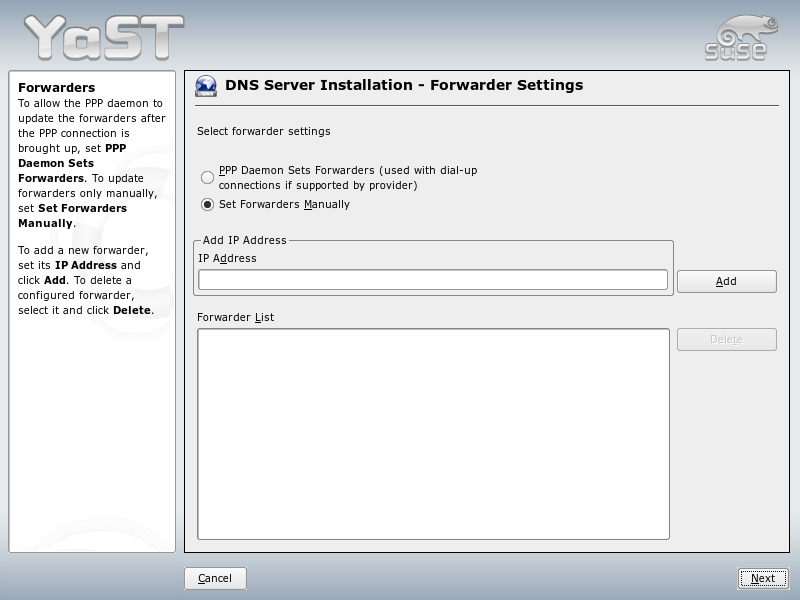
When starting the module for the first time, see the dialog shown in Figure 24.1, “DNS Server Installation: Forwarder Settings”. In it, decide whether the PPP daemon should provide a list of forwarders on dial-up via DSL or ISDN () or whether you want to supply your own list ().
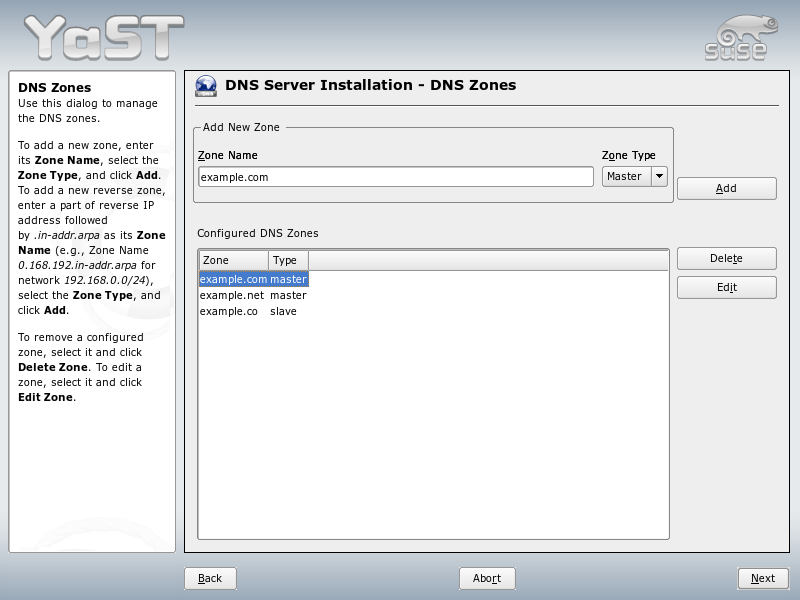
This dialog consists of several parts and is responsible for
the management of zone files, described in Section 24.4, “Zone Files”.
For a new zone, provide a name for it in . To add a reverse zone, the name must end
in .in-addr.arpa. Finally, select the (master or slave). See Figure 24.2, “DNS Server Installation: DNS Zones”. Click
to configure
other settings of an existing zone. To remove
a zone, click .
In the final dialog, you can open the ports for the DNS service in the firewall that is activated during the installation and decide whether DNS should be started. The expert configuration can also be accessed from this dialog. See Figure 24.3, “DNS Server Installation: Finish Wizard”.
After starting the module, YaST opens a window displaying several configuration options. Completing it results in a DNS server configuration with the basic functions in place:
Under , define whether the DNS server should be or by default. To start the DNS server right away, select . To stop the DNS server, select . To save the current settings, select . You can open the DNS port in the firewall with and modify the firewall settings with .
This is the same dialog as the one opened after starting the wizard configuration (see Forwarder Settings).
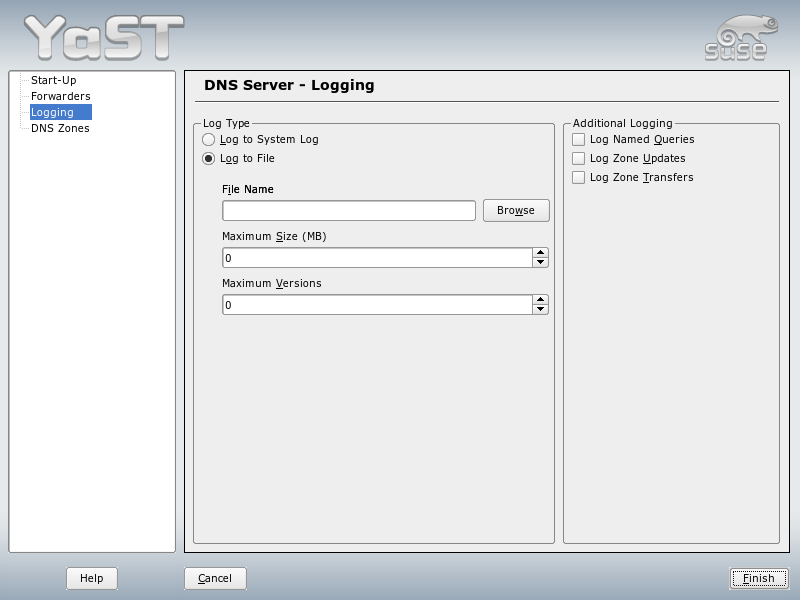
This section allows you to set what the DNS server should log
and how. Under , specify where
the DNS server should write the log data. Use the
systemwide log file /var/log/messages by
selecting or specify a
different file by selecting . In the
latter case, additionally specify the maximum file size in
megabytes and the number of log files to store.
Further options are available under . Enabling causes every query to be logged, in which case the log file could grow extremely large. For this reason, it is not a good idea to enable this option for other than debugging purposes. To log the data traffic during zone updates between DHCP and DNS server, enable . To log the data traffic during a zone transfer from master to slave, enable . See Figure 24.4, “DNS Server: Logging”.
This dialog is explained for the wizard configuration. See Section 24.1.1, “Wizard Configuration”.
This dialog opens if you selected the zone type in the step described in DNS Zones. Under , specify the master from which the slave should fetch its data. To limit access to the server, select one of the ACLs from the list. See Figure 24.5, “DNS Server: Slave Zone Editor”.
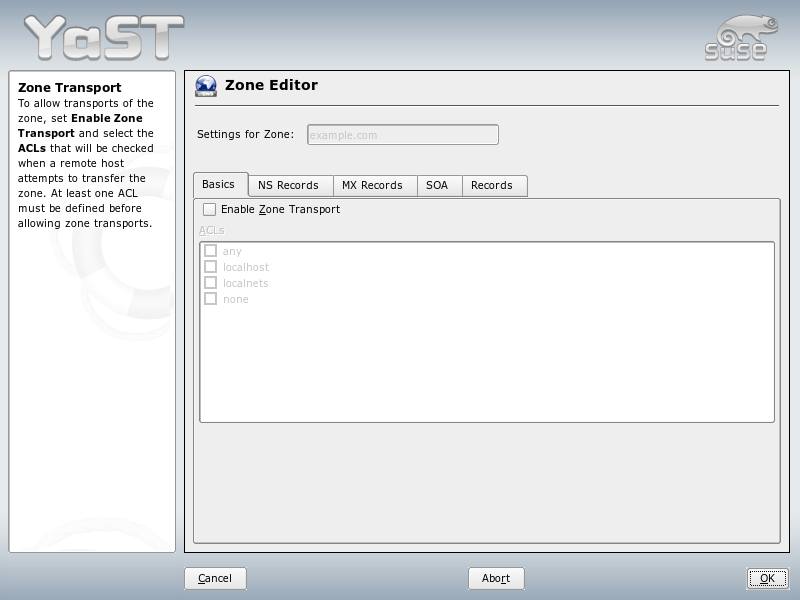
This dialog opens if you selected the zone type in the step described in DNS Zones. The dialog comprises several pages: (the one opened first), , , , and .
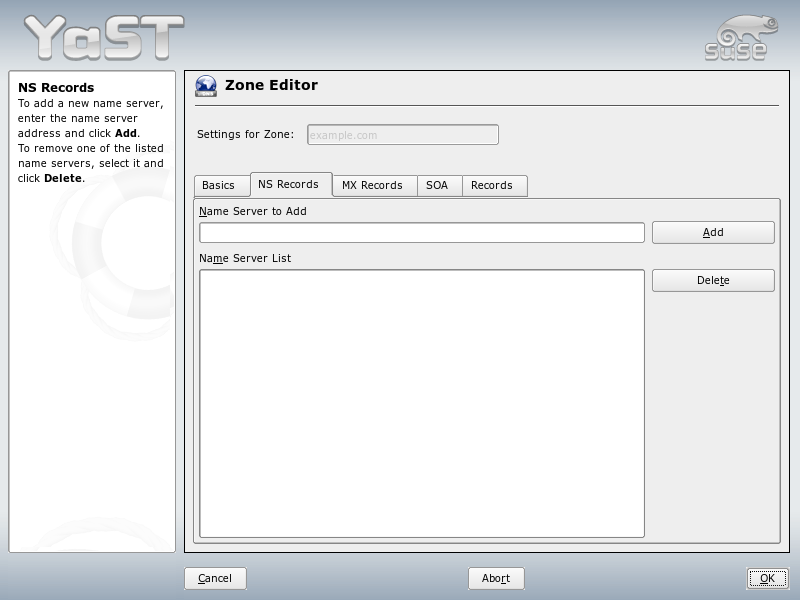
This dialog allows you to define alternative name servers for the zones specified. Make sure that your own name server is included in the list. To add a record, enter its name under then confirm with . See Figure 24.6, “DNS Server: Zone Editor (NS Records)”.
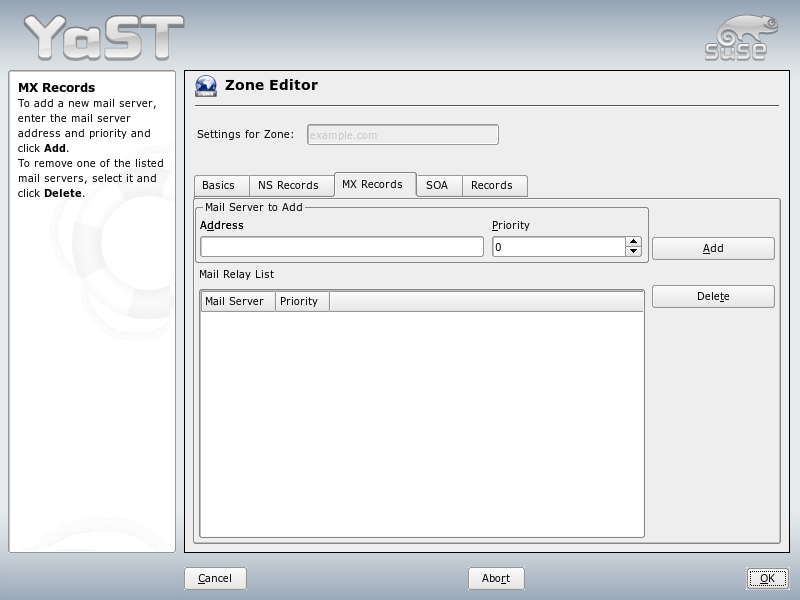
To add a mail server for the current zone to the existing list, enter the corresponding address and the priority value. After doing so, confirm by selecting . See Figure 24.7, “DNS Server: Zone Editor (MX Records)”.
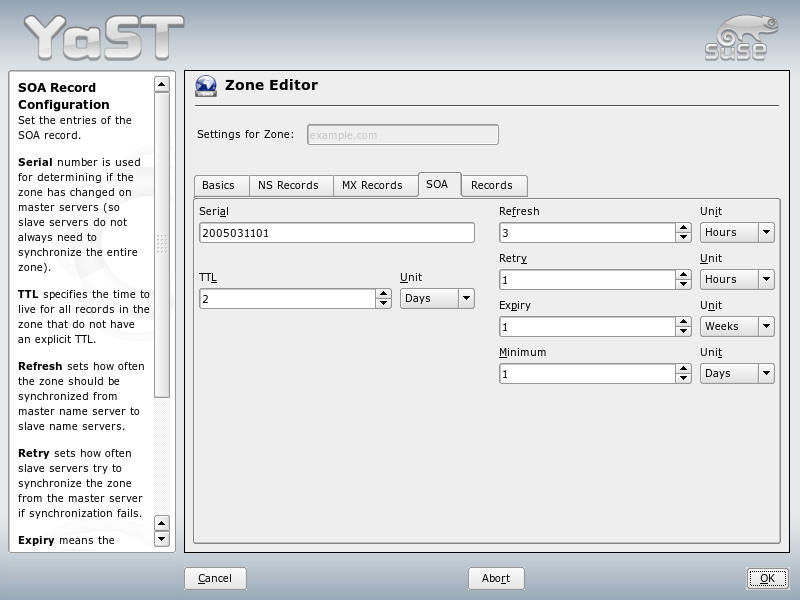
This page allows you to create SOA (start of authority) records. For an explanation of the individual options, refer to Example 24.6, “File /var/lib/named/world.zone”.
This dialog manages name resolution. In , enter the hostname then select its type. represents the main entry. The value for this should be an IP address. is an alias. Use the types and for detailed or partial records that expand on the information provided in the and tabs. These three types resolve to an existing A record. is for reverse zones. It is the opposite of an A record.